Fixing gaps in flooring is akin to mending the seams of a well-tailored garment. Just as a skilled tailor carefully hones the fabric to achieve a flawless finish, addressing gaps in flooring requires meticulous attention to detail.
From identifying the root causes to selecting the appropriate filler material and executing precise application, this article provides a comprehensive guide on rectifying gaps in flooring.
Whether you are a seasoned DIY enthusiast or seeking professional assistance, this guide offers valuable insights for a seamless solution.
Identifying the Causes of Gaps
Gaps in flooring can be caused by a variety of factors, including fluctuations in humidity and temperature. These changes can lead to the expansion and contraction of the wood, causing gaps to form. To prevent moisture-related gaps, it’s essential to acclimate the flooring to the environment before installation. Proper installation techniques, such as leaving the right amount of space for expansion at the edges of the room and using the correct adhesive, can also help prevent gaps from occurring in the first place.
Moisture prevention starts with assessing the subfloor for any signs of water damage and ensuring it’s dry and level before installation. Using a moisture barrier beneath the flooring can further safeguard against moisture-related gaps. Additionally, proper installation techniques involve leaving the right amount of space for natural expansion and contraction, typically around the perimeter of the room, and using the appropriate adhesive for the specific type of flooring being installed. Following these guidelines during installation can significantly reduce the likelihood of gaps forming due to moisture or improper installation.
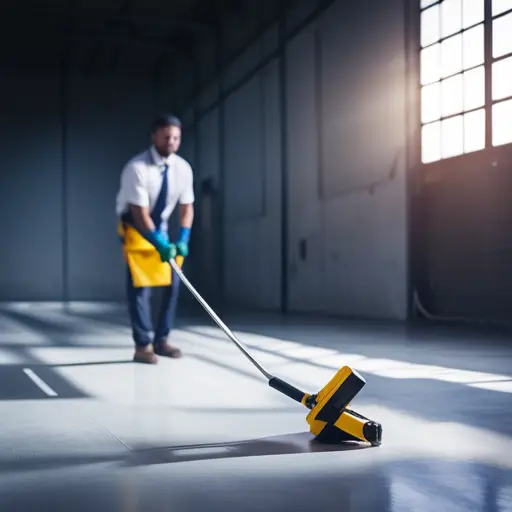
Preparing the Flooring Surface
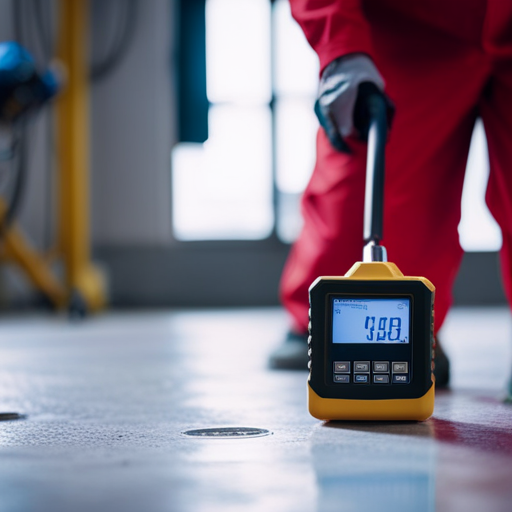
To prepare the flooring surface for installation, it is crucial to assess the subfloor for any signs of water damage and ensure its dryness and levelness. Surface cleaning is essential to remove any debris, adhesive residue, or other contaminants that could affect the new flooring’s adhesion. Additionally, moisture testing is vital to identify any excess moisture in the subfloor that could lead to future issues such as mold growth or flooring damage. This can be done using a variety of methods such as a calcium chloride test or a relative humidity test.
| Moisture Testing Methods | Description |
|---|---|
| Calcium Chloride Test | Measures the moisture vapor emission rate from the subfloor. |
| Relative Humidity Test | Measures the relative humidity within the subfloor. |
| Moisture Meter | Provides instant moisture content readings of the subfloor. |
Once the subfloor has been thoroughly cleaned and moisture levels have been assessed, the next step is to choose the right filler material to address any gaps or irregularities in the flooring surface.
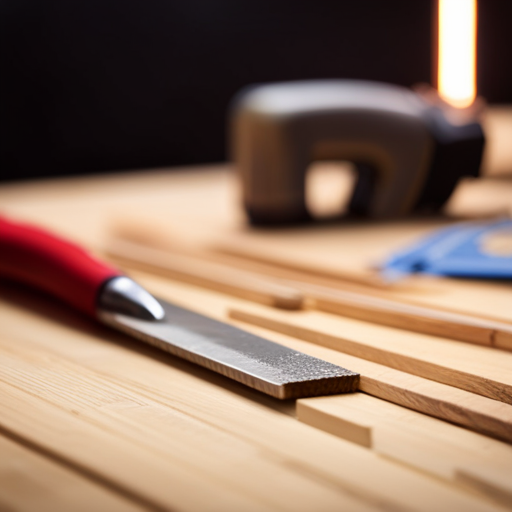
Choosing the Right Filler Material
After thoroughly cleaning the subfloor and assessing moisture levels, it is essential to select the appropriate filler material to address any gaps or irregularities in the flooring surface. When it comes to filler options, there are various materials to choose from, including latex-based fillers, epoxy fillers, and wood fillers.
Latex-based fillers are suitable for small gaps and are easy to apply, while epoxy fillers are more durable and can be used for larger gaps. Wood fillers are ideal for wooden floors as they can be stained and finished to match the surrounding wood.
Color matching is another crucial consideration when choosing the right filler material. It is important to select a filler that closely matches the color of the flooring to ensure a seamless and natural-looking repair. Many fillers are available in a range of colors or can be stained to achieve a custom match.
Before making a final decision, it is recommended to test the filler in a small, inconspicuous area to ensure that the color closely matches the flooring. By carefully considering filler options and color matching, it is possible to achieve a professional-looking finish when addressing gaps in flooring.
Filling the Gaps
Now that we have selected the appropriate filler material, the next step is to discuss the process of filling the gaps in the flooring. This involves choosing the right filler for the specific type of flooring and applying it correctly to ensure a seamless finish.
Additionally, we will explore the essential finishing and sanding techniques to achieve a polished and uniform appearance.
Choosing the Right Filler
One essential step in fixing gaps in flooring is selecting the appropriate filler to effectively fill the gaps. When choosing a filler, consider the type of flooring and the size of the gaps.
For smaller gaps, a latex or acrylic filler can be used, while for larger ones, an epoxy filler may be more suitable.
After selecting the right filler, proper application is crucial. Ensure that the gaps are clean and free from debris before applying the filler to achieve a seamless finish.
Additionally, regular filler maintenance is necessary to prevent future gapping issues. This includes periodic checks and reapplication if needed. By choosing the correct filler and maintaining it properly, you can effectively address and prevent gaps in your flooring.
Now, let’s delve into the process of applying the filler correctly.
Applying the Filler Correctly
To effectively fill the gaps in flooring, begin by applying the selected filler using a precise and controlled technique. Proper application is crucial for a seamless finish. Here are some key techniques to consider:
-
Clean the gaps: Thoroughly remove any debris or dust from the gaps before applying the filler to ensure better adhesion and a smoother finish.
-
Apply the filler evenly: Use a putty knife or applicator to spread the filler evenly across the gaps, ensuring that it fills the spaces completely without any air pockets.
-
Remove excess filler: After filling the gaps, carefully remove any excess filler from the surface of the flooring to prevent unevenness and to facilitate a smoother finishing process.
Finishing and Sanding Techniques
After applying the filler correctly, the next crucial step in fixing gaps in flooring involves implementing precise finishing and sanding techniques to achieve a smooth and seamless result.
When it comes to finishing and sanding, it’s essential to consider stain color options and environmental impact. Stain color options allow for customization to match the existing flooring or create a new look.
Additionally, selecting the appropriate finishing products is important due to their environmental impact. It’s crucial to choose products that are environmentally friendly and safe for indoor use.
As for sanding techniques, using the right equipment and following proper procedures is key to achieving a professional finish. Careful attention to detail during the finishing and sanding process will ensure that the gaps in the flooring are effectively filled and the overall appearance is enhanced.
Sanding and Finishing
The first step in addressing gaps in flooring is to carefully sand the surface to remove any unevenness and prepare it for finishing. Sanding is crucial in the process of wood floor gap repair, as it helps to level the surface and create a smooth foundation for the subsequent steps.
In addition to sanding, finishing the wood floor is equally important in ensuring that the gaps are effectively addressed. Here are key points to consider when sanding and finishing wood floors:
- Use the appropriate grit sandpaper to ensure effective removal of uneven areas.
- Coarse grit sandpaper is suitable for initial sanding to level the surface.
- Fine grit sandpaper is then used to create a smooth and polished finish.
- Apply wood filler to any remaining gaps before the finishing process.
Effective sanding and finishing not only repair the visible gaps but also enhance the overall appearance of the flooring, providing a seamless and polished look.
Moving forward, let’s explore preventive measures to avoid future gaps in the flooring.
Preventing Future Gaps
To prevent future gaps in flooring, regular maintenance and monitoring are essential. Moisture control is crucial in preventing gaps in flooring. Excessive moisture can cause wood to expand and then contract as it dries, leading to gaps. Using a dehumidifier in humid climates or ensuring proper ventilation in areas prone to moisture can help maintain a consistent environment for the flooring. Additionally, proper maintenance of the flooring is imperative. This includes promptly addressing any spills or leaks to prevent water damage, as well as using appropriate cleaning methods and products to avoid weakening the flooring materials. Regularly inspecting the flooring for any signs of wear, tear, or gaps and addressing them promptly can also help prevent larger gaps from developing. By implementing these measures, homeowners can significantly reduce the likelihood of future gaps in their flooring.
Transition: While preventative measures are effective, sometimes professional help or a DIY fix may be necessary to address existing gaps in flooring.
Professional Help Vs. DIY Fix
Professional flooring experts can provide valuable guidance and specialized skills to effectively address gaps in flooring, while homeowners may also consider DIY fixes for more straightforward repairs. When deciding between professional help and a DIY fix for flooring gaps, there are several factors to consider:
-
DIY benefits
-
Cost-effective: DIY fixes can be more budget-friendly, saving on labor costs.
-
Convenience: Homeowners can work on the repairs at their own pace, without having to schedule appointments with professionals.
-
Sense of accomplishment: Successfully completing a DIY flooring repair can be personally rewarding for homeowners.
-
Professional expertise
-
Precision: Flooring experts have the knowledge and tools to ensure precise and long-lasting repairs.
-
Time-saving: Professionals can complete the repairs efficiently, minimizing disruption to the household.
-
Quality materials: Experts can recommend and use high-quality materials that may not be readily available to homeowners.
Ultimately, the decision between seeking professional help or opting for a DIY fix depends on the complexity of the repair, the homeowner’s skill level, and the resources available.
Frequently Asked Questions
Can I Use the Same Filler Material for Different Types of Flooring, Such as Hardwood and Laminate?
When considering filler compatibility for flooring, it’s crucial to use the appropriate material for each type. Different flooring materials have specific installation processes, and using the wrong filler could lead to issues such as adhesion problems or aesthetic discrepancies.
Are There Any Long-Term Effects on the Flooring if I Don’t Fix the Gaps?
Neglecting to address flooring gaps can have long-term consequences on the structural integrity and maintenance of your flooring. Over time, gaps can lead to issues such as moisture damage, potential tripping hazards, and diminished aesthetic appeal.
How Can I Tell if the Gaps in My Flooring Are a Sign of a Larger Structural Issue?
It is important to assess flooring gaps for signs of underlying structural issues. A professional inspection can determine if gaps are indicative of potential problems with the structural integrity of the building, ensuring long-term safety and stability.
Is It Possible to Overfill the Gaps in the Flooring, and if So, What Are the Consequences?
Overfilling gaps in flooring can lead to a range of potential consequences, from aesthetic issues to structural problems. It’s crucial to ensure the filler material is compatible with the flooring to avoid long-term damage.
Are There Any Environmentally-Friendly Filler Materials That I Can Use for My Flooring Gaps?
When considering flooring gap solutions, eco-friendly fillers offer sustainable alternatives. Utilizing materials such as reclaimed wood, cork, or bamboo can minimize environmental impact. Prioritize sustainable options to address gaps while promoting eco-conscious practices.
Conclusion
In conclusion, addressing gaps in flooring requires thorough preparation and careful application of filler materials. By identifying the causes of the gaps and taking preventive measures, the risk of future gaps can be minimized.
Whether choosing to tackle the fix as a DIY project or seeking professional help, it is important to follow the proper steps to ensure a successful outcome.
By taking these steps, individuals can restore the integrity and aesthetics of their flooring, creating a more comfortable and inviting space for themselves and their guests.

Rubin Everest, a seasoned expert in the world of flooring, brings a wealth of knowledge and passion to the surface. As the mind behind ebbow.com, Rubin is dedicated to sharing insights on the latest trends, innovative solutions, and expert advice in the realm of flooring. Whether you’re seeking practical tips for installation or design inspiration, Rubin Everest is your go-to source for all things flooring-related, making your journey to the perfect floor an informed and enjoyable experience.