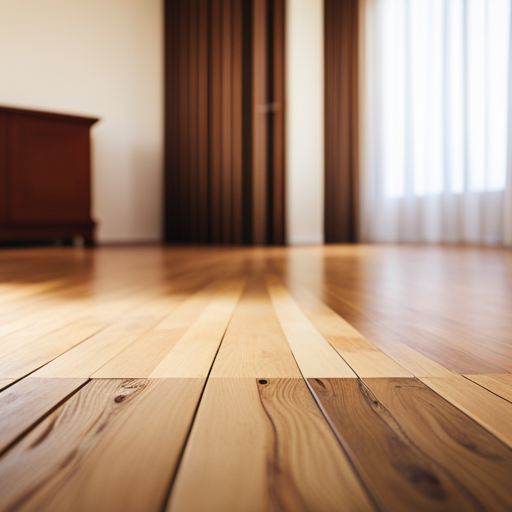
Did you know that old wooden floors can be restored to their former glory, adding value and beauty to your home?
Restoring old wooden floors requires a meticulous process, from assessing the condition of the wood to choosing the right stain or finish.
In this article, we will explore the steps involved in bringing old wooden floors back to life, helping you achieve a stunning and timeless look for your space.
Assessing the Condition of the Floors
Before beginning any restoration work, it is essential to thoroughly assess the current condition of the wooden floors. This involves identifying any damage that needs repairing and determining the need for refinishing as part of the restoration process.
When assessing the condition of the wooden floors, it is crucial to closely inspect the surface for any signs of wear and tear such as scratches, dents, or discoloration. Additionally, it is important to examine the structural integrity of the floors, checking for any loose boards or gaps between the planks. Identifying these issues will help in devising a comprehensive plan for the restoration process, outlining the specific repairs and refinishing techniques required to bring the wooden floors back to their former glory.
Furthermore, determining the need for refinishing involves evaluating the existing finish and considering the available finishing options to enhance the appearance and durability of the wooden floors.
Once the assessment is complete, the next step involves cleaning and preparing the surface for the restoration work.
Cleaning and Preparing the Surface
To commence the restoration process of old wooden floors, the initial step is to thoroughly clean and prepare the surface for the upcoming work. This involves using wood floor cleaners for deep cleaning and surface preparation. Wood floor cleaners are specifically designed to remove dirt, grime, and old polish from the surface, ensuring a clean and smooth base for the restoration process. Additionally, polishing the wood floor after cleaning can help to bring out the natural beauty of the wood, providing a lustrous and attractive finish.
To further illustrate the importance of this step, the following table outlines the key aspects of cleaning and preparing the surface:
| Cleaning and Preparing the Surface |
|---|
| 1. Use wood floor cleaners for deep cleaning |
| 2. Ensure thorough surface preparation |
| 3. Remove dirt, grime, and old polish |
| 4. Polish the wood floor for a lustrous finish |
| 5. Enhance the natural beauty of the wood |
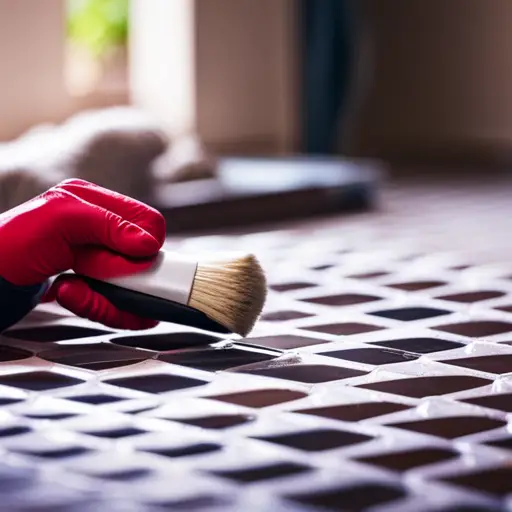
Repairing and Filling Gaps and Cracks
The restoration process for old wooden floors includes addressing the repair and filling of gaps and cracks in the surface. When repairing and filling gaps and cracks, it is essential to use appropriate wood filler techniques and ensure color matching for a seamless finish. Wood filler techniques involve carefully applying the filler to the gaps and cracks, followed by sanding to achieve a smooth and even surface. Color matching is crucial to blend the filled areas with the rest of the floor, providing a cohesive appearance.
In addition to repairing existing gaps and cracks, preventing future cracks is vital for the long-term preservation of the wooden floors. Proper moisture control is imperative to prevent the wood from expanding and contracting, which can lead to new gaps and cracks. This can be achieved by maintaining consistent humidity levels within the environment where the wooden floors are installed.
Additionally, using area rugs or mats in high-traffic areas can help minimize wear and tear, reducing the likelihood of new cracks forming. By employing these techniques, the restored wooden floors can maintain their integrity and beauty for years to come.
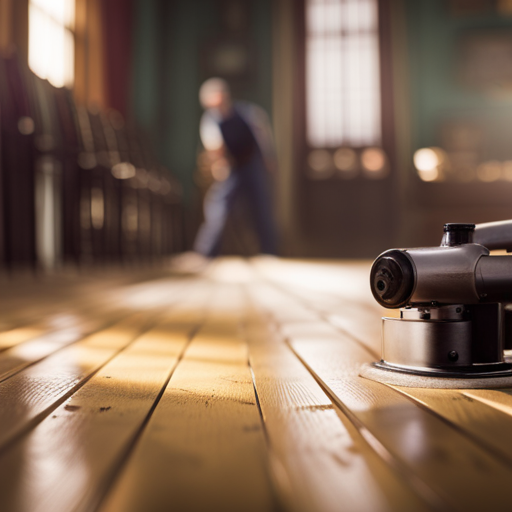
Sanding and Smoothing the Wood
Sanding and smoothing the wood is an essential step in the restoration process of old wooden floors. To achieve a professional finish and bring out the natural beauty of the wood, the following techniques should be considered:
-
Professional sanding: Utilizing professional-grade sanding equipment is crucial for effectively removing old finishes, scratches, and uneven surfaces. This process helps to prepare the wood for a new finish while ensuring a smooth and even surface.
-
Wood refinishing techniques: Employing the right wood refinishing techniques, such as using progressively finer grit sandpaper and employing proper sanding motions, is essential for achieving a smoother finish. This step is vital in bringing out the natural grain and character of the wood.
-
Smoother finish: After sanding, using a wood filler to fill in any remaining imperfections and sanding it down to achieve a perfectly smooth surface will result in a flawless finish that is ready for the next stage of restoration.
Sanding and smoothing the wood sets the foundation for the subsequent stage of choosing the right stain or finish, which will enhance the overall look and durability of the restored wooden floors.
Choosing the Right Stain or Finish
After smoothing the wood to a flawless finish, the next critical step in the restoration process is selecting the appropriate stain or finish to enhance the natural beauty and durability of the wooden floors. When choosing a stain or finish, it’s essential to consider the color options and compatibility with different wood types. Here is a table detailing some popular stain and finish options:
| Stain/Finish | Color Options | Compatibility with Wood Types |
|---|---|---|
| Oil-Based | Wide range of colors | Suitable for most wood types |
| Water-Based | Varied color options | Best for light-colored woods |
| Polyurethane | Amber hue options | Compatible with all wood types |
Oil-based stains offer a wide range of color options and are suitable for most wood types. Water-based stains provide varied color options and are best for light-colored woods. Polyurethane finishes come in amber hue options and are compatible with all wood types, providing a durable and long-lasting finish. When choosing a stain or finish, consider the natural color of the wood and the desired outcome to achieve a stunning result.
Applying the Stain or Finish
Now that the right stain or finish has been chosen, the next crucial step is the application process.
The key points to consider include ensuring the chosen stain is applied evenly across the entire surface and that the finish is applied with care and precision.
These steps are essential to achieving a beautifully restored wooden floor.
Choosing the Right Stain
To achieve the desired finish for restoring old wooden floors, it is essential to carefully select a high-quality stain that complements the natural grain and color of the wood. When choosing the right stain, consider the following:
-
Stain color: Select a stain color that enhances the beauty of the wood while also matching the overall aesthetic of the space. Darker stains can add richness and depth, while lighter stains can create a more airy and open feel. It’s essential to test the stain on a small, inconspicuous area of the floor to ensure it achieves the desired color.
-
Application techniques: Proper application of the stain is crucial for achieving an even and consistent finish. Whether using a brush, rag, or applicator, ensure that the stain is applied evenly and in the direction of the wood grain to highlight its natural beauty.
Careful consideration of stain color and application techniques will contribute to a successful restoration of old wooden floors.
Applying the Finish Evenly
The next crucial step, following the careful selection of the right stain, is to apply the finish evenly to the restored old wooden floors, ensuring a smooth and consistent coating that accentuates the wood’s natural beauty.
When applying the finish, the choice between brush application and spray application is pivotal. Brush application offers more control, making it suitable for intricate areas, while spray application provides a faster and more even coverage, ideal for larger surfaces.
Furthermore, the decision between an oil-based finish and a water-based finish is significant. An oil-based finish enhances the wood’s natural color and grain, providing a more traditional look, while a water-based finish dries faster, emits fewer fumes, and has a less impactful environmental footprint.
Both options offer durability and protection, enhancing the longevity of the restored wooden floors.
Maintaining and Caring for Restored Floors
Maintaining and caring for restored wooden floors is essential to preserve their beauty and durability.
Regular cleaning routines and protective floor treatments are key to prolonging the life of the restored floors.
Regular Cleaning Routines
Regular cleaning is essential for maintaining the restored beauty of old wooden floors. Proper maintenance and preventive measures play a crucial role in preserving the longevity of the flooring. Here are some effective cleaning routines to ensure the continued splendor of your restored wooden floors:
-
Sweep or Vacuum Regularly: Remove dirt, dust, and debris to prevent scratches and wear.
-
Use a Damp Mop Sparingly: Clean the floors with a slightly damp mop and a pH-neutral wood floor cleaner to avoid water damage.
-
Avoid Harsh Chemicals: Refrain from using harsh cleaners or abrasives that can damage the protective finish.
These routines will help maintain the luster of the restored wooden floors.
Transitioning into the subsequent section, protective floor treatments are also essential for long-term preservation.
Protective Floor Treatments
Implementing protective floor treatments is crucial for maintaining and caring for restored wooden floors. After investing time and effort into restoring old wooden floors, it’s essential to protect them from wear and tear. Utilizing protective coatings can significantly extend the lifespan of the restored floors and keep them looking pristine for years to come. Additionally, following simple maintenance tips can further ensure the longevity of the wooden floors. Here are some maintenance tips to consider:
| Maintenance Tips | Protective Coatings |
|---|---|
| Clean Regularly | Apply Wax |
| Avoid Water Damage | Use Polyurethane Seal |
| Protect from Furniture | Apply Shellac |
Frequently Asked Questions
Can I Restore My Old Wooden Floors Myself, or Do I Need to Hire a Professional?
When considering DIY restoration or professional help for old wooden floors, it’s important to weigh the cost comparison and technical expertise required for refinishing techniques. Assessing your skills and the condition of the floors is crucial.
How Do I Know if My Old Wooden Floors Are Beyond Repair and Need to Be Replaced?
Assessing the condition of old wooden floors involves a meticulous process to determine if repair or replacement is necessary. DIY restoration may be feasible, but professional services ensure proper sanding, eco-friendly finishes, longevity, and maintenance tips.
What Are Some Common Mistakes People Make When Attempting to Restore Their Old Wooden Floors?
Common mistakes in the restoration process of old wooden floors include improper sanding techniques, insufficient preparation, and neglecting to address underlying issues. DIY attempts may be cost-effective initially, but professional restoration often yields superior results.
Are There Any Environmentally-Friendly Options for Staining and Finishing Old Wooden Floors?
When considering environmentally-friendly options for staining and finishing old wooden floors, it’s important to prioritize eco-friendly staining and sustainable finishing. The restoration process should focus on minimizing environmental impact, and maintenance tips should align with eco-conscious practices.
How Long Can I Expect the Restored Finish on My Wooden Floors to Last Before Needing to Be Redone?
The longevity of the finish on restored wooden floors varies based on factors such as foot traffic and maintenance. DIY restoration may require more frequent touch-ups, whereas professional help typically results in a longer-lasting finish with proper care.
Conclusion
In conclusion, restoring old wooden floors requires careful assessment, thorough cleaning, repairs, sanding, and the application of the right stain or finish.
Once restored, the floors should be maintained and cared for to preserve their former glory.
With patience and dedication, the process of restoring old wooden floors can transform them from dull and worn to stunning and vibrant, breathing new life into any space.

Rubin Everest, a seasoned expert in the world of flooring, brings a wealth of knowledge and passion to the surface. As the mind behind ebbow.com, Rubin is dedicated to sharing insights on the latest trends, innovative solutions, and expert advice in the realm of flooring. Whether you’re seeking practical tips for installation or design inspiration, Rubin Everest is your go-to source for all things flooring-related, making your journey to the perfect floor an informed and enjoyable experience.